Friday, 24 October 2014

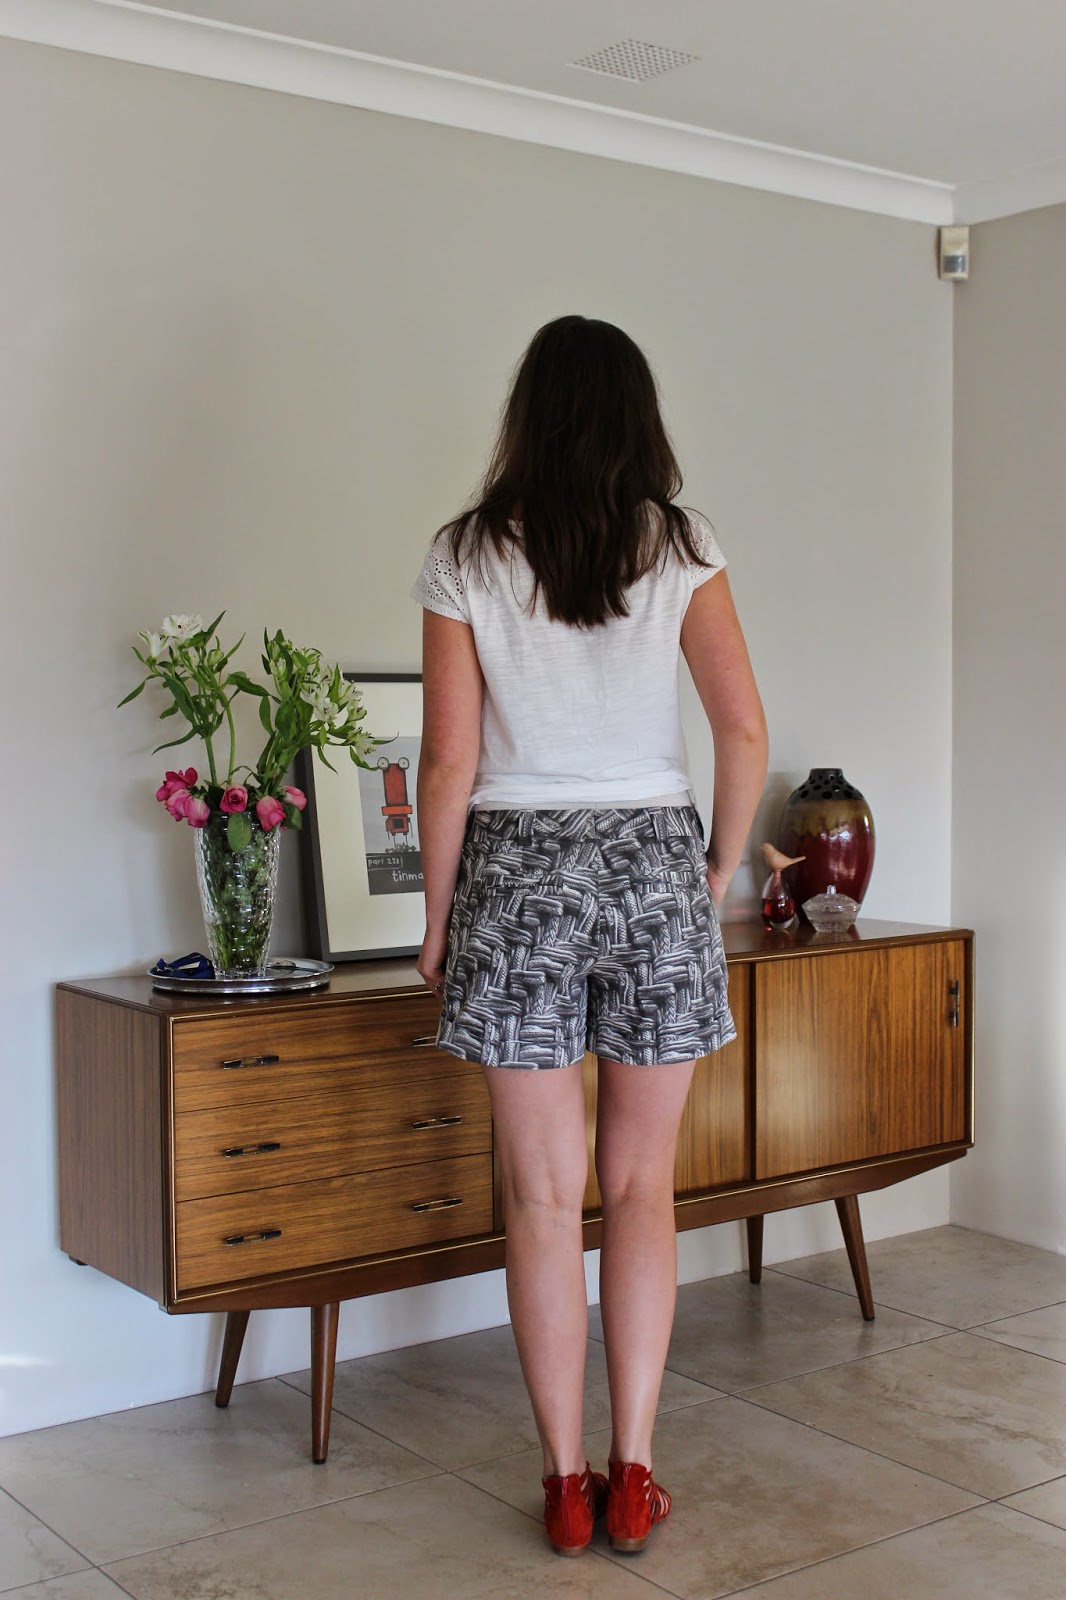
Completed: Sewaholic Thurlow Shorts

I feel like I'm finally getting the hang of this blogging business! And now thanks to a tripod and a handy remote I can finally take photos of my finished garments without having to bully coerce family members into taking photos for me!!

Styled with a RTW white shirt

This isn't the first time I've made the Sewaholic Thurlow shorts but it is the first time I've ended up with something wearable! The first pair was destined for failure from the very beginning thanks to me choosing the completely wrong size (don't ask! I think I was having a fat day or something) and so as a result no matter how much altering and adjusting I did they just would not sit right... well I'm happy to report that (believe it or not) going down two sizes to a size 6 has produced a pair of shorts that fit perfectly with no adjustments WHATSOEVER!! Winning!!

Styled with my grey/black Grainline Scout Tee...

I used some medium weight cotton drill I purchased on sale from Spotlight. At first I was unsure as to if the patterned fabric would look OK as a pair of shorts considering they have so much going on already but then I figured that the pattern was random enough that I wouldn't need to worry about pattern matching and hey, it was on sale so worst case scenario they become my painting shorts or something. I'm glad I chose to use the fabric after all, the grey/brown/cream colours make it easy to pair things together and its something different than the other plain colours I have. Just looking at the photos now but I think the shorts will suit a slightly tighter tee as these shorts are very loose/flared around the leg and need a more fitted top to balance out the silhouette.


At first I was going to leave out the welt pockets as I wasn't sure if the combination of the print and welt seams would look to busy (totally not because I couldn't be bothered) but looking at it now I'm glad I chose to suck it up and do them. They give that RTW look plus its good practice for when I sew my Ralph Rucci coat welt pockets.

Spot the welt pockets... they blend in so well


Front - check out that pattern matching! Complete accident believe it or not!

Side view


The false cuff nicely topstitched
The guts, first time inserting the zip the 'proper' way and actually finishing off the buttons and buttonholes


A near perfect fit with no pulling or wrinkles around the crotch area
\
Same with the back, no lines or pulling even over the butt


I think these shorts are going to get a lot of wear over the next few months. I'm hoping to make another couple pairs in gunmetal grey, navy and maybe even a floral.

Pattern: Sewaholic Thurlow Trousers and Shorts
Fabric: Cotton Drill from Spotlight
Size 6 - no adjustments

Sunday, 19 October 2014

Completed: Named Patterns Kanerva Blouse


This is actually the second pattern I've used from Named Clothing SS14 collection, the first being my *as of yet unblogged* Jamie Jeans. There are a lot of things to love about this pattern company! I adore how they release the patterns in seasons just like a fashion label and the little details that make each piece something unique and special. As much as I love vintage style clothing it is refreshing to find a pattern company that specialises in classic modern silhouettes and everyday basics. They have also recently released some of their patterns in paper format which is nice for some of us who cant be bothered with taping a million pieces of paper together! And apparently, recently updated their instructions to a more user friendly format.


I chose to make the Kanerva Blouse for a number of reasons. I loved how it was a cropped top, perfect for wearing with high waisted skirts without the need for tucking them in. It makes for a different silhouette which I now find I actually prefer. The only downside is not being able to wear it with low waisted pants or jeans without looking like a 90s tramp.


I may or may not have *stuffed up* when choosing the right size. I went off the finished garment measurements as I wanted the shirt to fit snug but now looking at the photos it may be a tad too tight. It also may look like I copied the fabric choice with this pattern too, but in my defence, I had been meaning to make myself a boat neck stripe top out of my navy and white stripe knit (left over from this project) and this happened to be the perfect pattern.

The pattern calls for fabric with slight stretch to make it easier to pull the shirt over the head rather than perform a variety of yogaish poses to button up the back buttons. I decided to go for a knit which worked well, but, hindsight is a wonderful thing and now its occurred to me that I probably could have left out the front side and centre darts...doh!! I managed to line the stripes on the centre darts quite well (it took me a couple of goes) but I really think it would have looked better without them as it draws attention to my bust area.


In other news, it appears I have conquered the stripe!! This shirt almost kicked my butt *read: was almost sent to the WIP box, never to see the light of day* but I persevered and managed to get every seam *almost* perfectly lined up. I discovered that decisions you make in the cutting stage really can affect the final perfect stripe matched product so it really pays to give some forward thinking and a little bit of hand basting is sometimes preferable over pins.


Other than that I'm very happy with this pattern, its simple, classic shape yet still modern and stylish and by the look of it I'm going to get quite a bit of wear out of it this winter. I've yet to add a row of gold buttons down the back to add some visual interest.

The skirt is actually another Named Pattern! The Vanamo Skirt!! This is my second version of the skirt, the first is yet unfinished un-blogged but I'm hoping to pull my finger out and get it up on the blog soon.


Completed: Classic Breton Shirt

Looking through my closet the other day I realised I have so many completed items that haven't been blogged yet!! The one that really stands out is my classic Breton shirt with a twist. I have been wearing this shirt to DEATH over the past few months (yes, its been finished for that long!!) so much so that its started to ball up and look rather ugly. But that's OK because there was a number of things I wasn't happy with in the end with this shirt. I'm hoping to make another one exactly the same, hopefully only this time without all the errors of the last one. The fabric turned out to be a total bitch to find. I ended up finding the perfect fabric online at Harts Fabric over in the States. It was pretty expensive ($17US per yard from memory) and the postage to Australia cost me almost as much as the fabric itself!! But striped knit fabric is turning out to be very hard to source and I had my heart totally set on making a similar shirt to this one by T by Alexander Wang.


I used the Ensis Tee pattern by Papercut Patterns (so in love with this pattern company!!) as the pattern design matched my inspiration perfectly. I did my best to match the stripes but a combination of a first-time sewing with stretch fabric and no prior experience in pattern matching proved to be my downfall. Also taking more than 4cm off each side seam doesn't help much either. All up it proved to be an epic fail in the stripe matching department with only one seam in the whole thing matching perfectly. Ah well, they say that practice makes perfect!


With the next one I'm thinking I might make a smaller size as I ended up taking at least 4cm off each side seam and a couple cm off the sleeve and underarm seams.
Despite all the errors in this shirt I still love it and wear it proudly. I think its important to remember that most RTW clothing (even the more expensive ones) often don't get the pattern matching perfectly either. I think sometimes we can be too critical and demand perfection of our me-mades so I'm trying not to get too bogged down by my unmatched seams. As for the fit its not perfect either but its comfortable and easy to wear. I'm looking forward to having another one of these in my closet!


Inspiration: T by Alexander Wang RRP$235
My Classic Breton Shirt $50.50
Fabric: approx 1yard white striped fabric $17.00 approx 1/2 yard navy striped fabric $8.50
Pattern: Ensis Tee by Papercut Patterns $25.00

Completed - Wenona Shirtdress

Here she is! My very own, much anticipated Miranda Kerr inspired shirtdress!! It feels so good to finally have made the thing that has been floating around in my head for the past year and a half and just in time for summer too!


As discussed in my previous inspiration post I used the Named Patterns Wenona Shirtdress as the basis for the dress but with a couple of adjustments (obviously!). I love this style of dress so much I've ear-marked some fabric for a two-tone long sleeved autumn/winter dress... is it ok to be hanging out for winter and its not even summer yet?! Its so hard to see all you inspiring northern hemisphere bloggers sew up snuggly knits and awesome coats while us southern hemisphere bloggers try to get psyched for summer, only to be oogling all your gorgeous summer stuff once we get back to winter!! ;-)

Close up of the button and collar detail


Anyway, before I get into all the nitty grittys of my dress there is one thing I'd like to point out to anyone thinking of sewing their own Wenona Shirtdress. This pattern has a lot of ease, and I mean, a lot of ease! I'm not to sure why this is or if this was the look they were after although just looking at the model from the pattern its not super obvious the dress is so loose, so I'm not to sure what happened there.
Either way, I'm normally a size 10 to 12 with every single one of the Named patterns I've used so far but (having done some sneaky pre-sewing research and finding excess ease was an issue) I ended up using the finished garment measurements and found I just fit into the Size 0 category... bahahaha... not even close to size 0 in real life but I'm not complaining!! Thankfully I picked this up before I printed off the PDF or else I would have had to print off and tediously tape together two lots of pattern sheets.
This shouldn't, however, discourage you from sewing up this pattern. I know I tend to go on and on a little bit about this pattern company but I'm seriously impressed with how well the pattern pieces fit together and how clear the instructions are. And I especially love the little details that take this from homemade to another level. For example, this was my first attempt at sewing a collar and collar stand and I've heard some horror stories when it comes to sewing a neat, professional collar and stand so I was very impressed with how mine turned out (being first time and all) thanks to the detailed instructions.


My poor attempt at the 'Angelina Jolie leg' pose

Great, now that that's out of the way I can get back to the nitty gritties.
I made a couple adjustments to the pattern to get the look I was after:
  • I removed the sleeves and bias bound the armhole, I didn't change the shape of the armhole as I thought I would have in my inspiration post
  • Added two 2cm darts in the bodice back and two 2.5cm darts in the skirt back to counteract the unsightly bagging thanks to a combination of excess fabric, a swayback and some stiffer than expected cotton fabric (I think I need to fabric soften the shit out of this dress before it will hang the way I want it to)
  • I removed the point in the collar back, opting for a sleek curve instead (the whole thing was starting to look at little bit too 'Little House on the Prairie' for me)
  • Added around 50cm to the length of the dress to take it from knee length to maxi dress length
  • reconfigured the button placement to ensure there would be no gaping around the boob area as things were looking a little bit snug


The other little details which I think kinda make the dress are:
  • charcoal grey topstiching the seam lines, collar and collar stand
  • the same charcoal grey colour buttons and buttonholes
  • a belt! Not handmade but it sure does provide the much needed contrast and takes the dress to modern rather than the before suggested LHOTP look.

At the end of the day I'm over the moon with this dress. I expect it will get a lot of wear this summer thanks to the cool cotton fabric and the maxi length means I can dress it up or down depending on the occasion. The fabric is my biggest bug bear at the moment as, for some reason, I was expecting soft, drapey rayon not stiff cotton. I'm hoping a couple washes in some fabric softener and white vinegar will help with the hang and drape of the dress, but if not I guess you live and learn. The joys of being so caught up in making a dress similar to the inspiration that you end up having limited fabric choice.


Named Patterns Wenona Shirtdress
Size 0
Fabric composition: Cotton